> For the complete documentation index, see [llms.txt](https://helpcenter.gitprotect.io/llms.txt). Markdown versions of documentation pages are available by appending `.md` to page URLs; this page is available as [Markdown](https://helpcenter.gitprotect.io/backup-and-recovery/devops/gitlab/recovery/recovering-multiple-repositories.md).
# Recovering multiple repositories
In this article, you will learn how to restore multiple repositories to a Git service or localhost.
## Recovery process
{% stepper %}
{% step %}
Get into the restore view using the following method:
1. Open the **GitLab** tab (**DevOps** > **GitLab**), then click the **Manage & Restore** button next to the organization whose backup you want to restore.
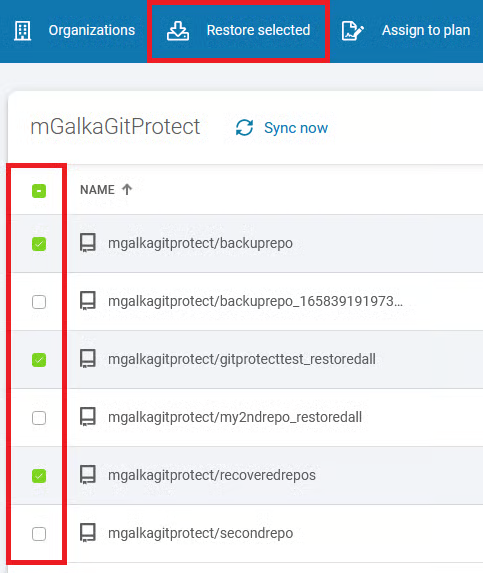
2. Select the repositories you want to restore and click the **Restore selected** button in the top menu.
{% endstep %}
{% step %}
By clicking an individual repository, an aside will appear where you can select a **backup plan** and a **backup version** to restore. Click **Select** under your chosen backup copies to continue.
{% endstep %}
{% step %}
Select the destination for the restore process. You can choose one of the assigned organizations from any **Git** service or any device.
{% endstep %}
{% step %}
Choose whether to include metadata in the backup.
{% endstep %}
{% step %}
Next, select the destination where you want to restore the data.
#### A. Restore to a Git organization
In **Map organizations** section, select the target organizations where the repositories will be restored.
{% hint style="info" %}
If the recovery destination is **Azure DevOps**, the **Map organizations** section will be replaced by **Target organization** and **Target project** settings.
{% endhint %}
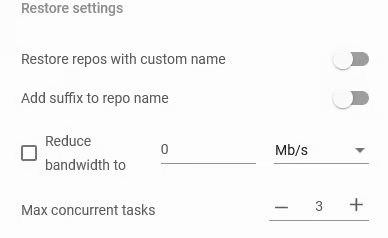
In the **Restore settings**, you can configure the following options:
When you toggle **Restoring repos with custom name** switch, a window will appear allowing you to rename one or more repositories.
{% hint style="danger" %}
Restoring never overwrites existing repositories in the organization — if you do not choose a repository name, or if you enter the name of a repository that already exists in your organization, **the restore will fail**. To complete the restoration successfully, you must choose a unique repository name or select the **Add suffix to repo name** option so the restored repository keeps its original name with an automatically generated suffix.
{% endhint %}
#### B. Restore to a device
{% hint style="warning" %}
To restore a repository to a local device, you must have a **Git** client installed on that device.
{% endhint %}
{% hint style="danger" %}
You can restore **only the repository** (without metadata) when restoring data to local resources.
{% endhint %}
1. Select the destination device.
2. Make sure the device where you want to restore data has the **GitProtect agent** installed and the **Git** client added to the **PATH** environment variable. The **PATH** variable is usually configured automatically after **Git** installation (a system restart may be required). If it isn’t, set it manually to the path of the **git.exe** file: `C:\Program Files\Git\bin\git.exe`
{% hint style="info" %}
To configure the **PATH** variable, open the environment variables, select the **PATH** variable, and click the **Edit** button. Copy the path to the **git.exe** file and add it to the **PATH** variable.
{% endhint %}
3. Select the directory where you want the data to be restored.
{% hint style="success" %}
If a repository already exists in the selected folder, you can choose to overwrite the existing data.
{% endhint %}
4. Additionally, in the **Restore settings**, you can limit bandwidth usage during the recovery process.
{% endstep %}
{% step %}
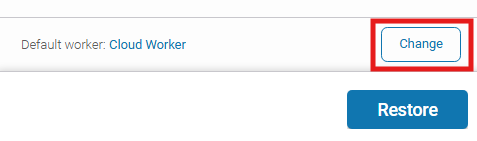
Choose the device that will be responsible for performing the restoration.
{% endstep %}
{% step %}
After defining all parameters, click the **Restore** button to begin the restore process. When the process is complete, new repositories will be created in your organization account.
{% endstep %}
{% endstepper %}
***
## Useful links and items
{% content-ref url="/pages/AWu8w4uJUkVdjFTGajr0" %}
[GitProtect worker](/deployment-and-configuration/gitprotect-worker.md)
{% endcontent-ref %}
{% content-ref url="/pages/NqYA6IzA1GmHxLsZwtrZ" %}
[Cross-recovery for DevOps organizations](/backup-and-recovery/devops/general/cross-recovery-for-devops-organizations.md)
{% endcontent-ref %}
{% content-ref url="/pages/IiVUjDfL7V7Z9YEIHaQs" %}
[LFS recovery for DevOps organizations](/backup-and-recovery/devops/general/lfs-recovery-for-devops-organizations.md)
{% endcontent-ref %}
{% content-ref url="/pages/KUrX1uY5hrsK7Rn9NVmn" %}
[Wiki recovery for DevOps organizations](/backup-and-recovery/devops/general/wiki-recovery-for-devops-organizations.md)
{% endcontent-ref %}
{% content-ref url="/pages/ajngMEBoS6fhnIrEkYfE" %}
[Throttling prevention](/rate-limiting-and-throttling/throttling-prevention.md)
{% endcontent-ref %}
.png?alt=media)
.png?alt=media)

.png?alt=media)