> For the complete documentation index, see [llms.txt](https://helpcenter.gitprotect.io/llms.txt). Markdown versions of documentation pages are available by appending `.md` to page URLs; this page is available as [Markdown](https://helpcenter.gitprotect.io/backup-and-recovery/jira/recovery/disaster-recovery.md).
# Disaster recovery
In this article, you will learn how to recover your Jira organization using the disaster recovery option.
#### With Jira disaster recovery you can quickly restore your entire Jira organization after a major failure, keeping your spaces, work items, and configuration data available and consistent.
***
## Recovery process
{% hint style="danger" %}
Due to **Atlassian** API changes that took effect on March 30, 2026, the disaster recovery backup and restore functionalities are no longer available. **To ensure continued protection of your Jira data, please switch to the granular backup plan.** Data previously protected with disaster recovery backups can still be restored using the disaster recovery or granular recovery option.
{% endhint %}
{% hint style="info" %}
When restoring **Jira** automation rules associated with an assets schema (i.e., during a granular restore to another organization or a disaster recovery where the target organization already contains assets), a different assets schema may be attached to the restored rule component. This behavior is the same as when rules are manually imported through the **Jira** UI.
{% endhint %}
{% hint style="danger" %}
Connections to external services (i.e., **Google Drive**) are **not restored** in automation components when restoring data in disaster recovery mode or to another organization.
{% endhint %}
{% stepper %}
{% step %}
Get into the restore view using the following method:
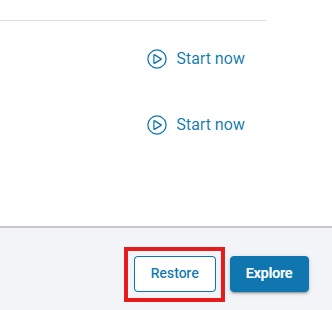
1. Open the **Jira** tab (**DevOps** > **Jira**), then click the **Restore** button next to the organization whose backup you want to restore.
{% hint style="success" %}
You can also use the **Explore** button to restore your data.
{% endhint %}
{% endstep %}
{% step %}
Next, select the disaster recovery backup plan from which you want to restore data.
{% endstep %}
{% step %}
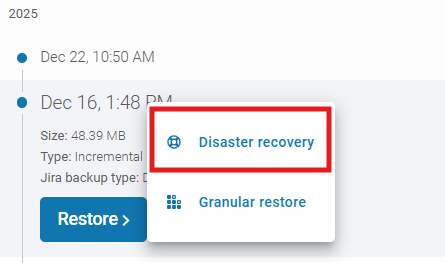
Choose the backup version from all the backups that have already been performed — select the desired date and click the **Restore** > **Disaster recovery**.
{% endstep %}
{% step %}
Select the available destination for the restore process from the list:
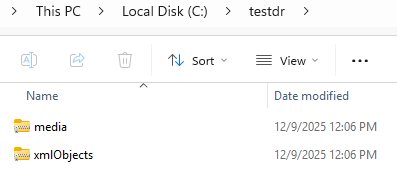
1. If the restoration destination is a device, **you must specify the recovery path**. If you want to change the **default worker** responsible for handling the restore, make sure to do it **before selecting the backup copy to restore**.
{% hint style="info" %}
If you select a device as the restoration destination, **GitProtect** will recover all protected **Jira** data included in the selected backup plan as separate, compressed (zipped) folders.
{% endhint %}
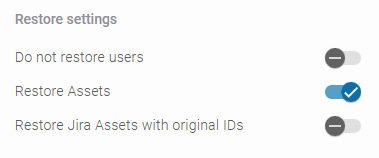
2. If the restoration destination is **Jira**, you can change the **default worker** in the next aside. In **Restore settings**, you can also choose whether you want to restore assets and users.
{% hint style="danger" %}
The disaster recovery process replaces all existing data (**except users and assets**) in the selected **Jira** instance, and the backup may not include every item stored in that environment.
{% endhint %}
{% hint style="warning" %}
Jira enforces several limitations. **Atlassian** limits the number of **Jira** backup restores per organization to **100**. A restore also affects your **Jira** usage — the process can take some time, and **during this period your Jira instance will not be accessible**.
{% endhint %}
{% hint style="success" %}
You can choose to preserve the original **Jira Asset** **identifiers** during a **disaster recovery**.
{% endhint %}
{% endstep %}
{% step %}
After defining all parameters, click the **Restore** button to begin the recovery process. You can monitor its status in the **Tasks** tab.
{% endstep %}
{% endstepper %}
***
## Post-recovery actions for GitProtect installed via Atlassian Marketplace
When you restore a backup to the original organization (the source organization from which it was created) using the disaster recovery method, **the GitProtect.io for Jira application is removed from your Jira site and must be reinstalled afterward**.
To add the **GitProtect** app to your **Jira** site again, go to **Apps** > **Explore more apps** and search for **GitProtect.io for Jira**. On the app page in **Atlassian Marketplace**, click **Try it free** and follow the on-screen instructions. The process is the same as when you added the app for the first time, except you do not need to provide a personal access token because **GitProtect** is already integrated with your **Jira** account.
{% hint style="success" %}
Adding the app to your **Jira** site again does not modify the trial period and does not change your current subscription model.
{% endhint %}
Once the app is reinstalled, you can view your backup statistics and use all **GitProtect.io for Jira** app features.